Mini Belgian Holiday Haul!

Sunday 22 June 2014

Hello! Just a quick post this week as I am busy getting back into the swing of school and all that jazz!

 So, I thought I'd show you lovely people the few things I bought (other than chocolate!) when I was in Belgium a couple of weeks ago!


These beautiful nail varnishes were from a cool shop called Hema which sells a little bit of everything including the items below!


I love stationery and I couldn't resist getting these beautiful fabric tapes


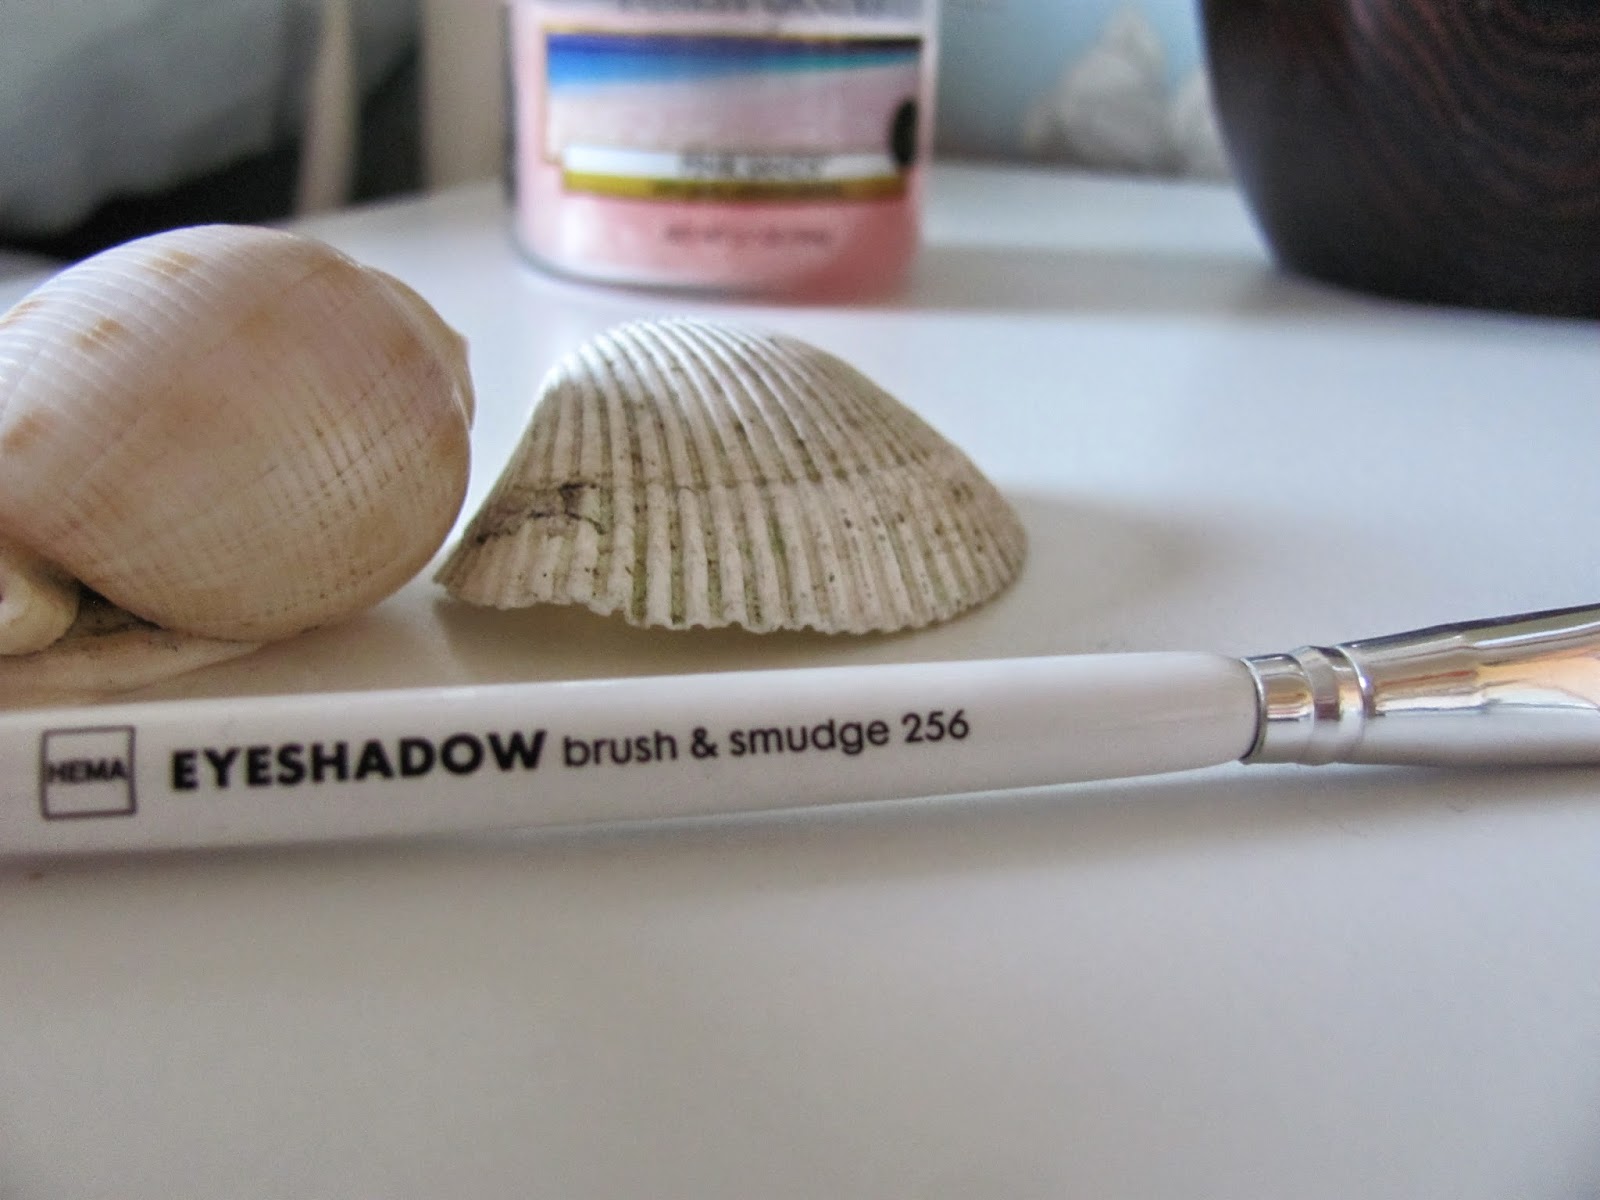
Hema's make up range it pretty decent for what it is and I just happened to be looking for some new eye make up brushes when we were there! This is so handy for travelling as well!


And finally I also got these funky print shorts from a store called Vero Moda. I'm yet to see a store here in Britain, only in Europe but the brand is available on ASOS! I love the shorts as they are loose and perfect for a festival look!

 
That's it for my foreign purchases this time round! Which is your favourite? Comment below!

- Amy Caitlin xo


My Belgian Adventure!

Sunday 15 June 2014

Hi there!

I've been on my travels again and this time I went to Bruge in Belgium! This time I went with my parents as my exams finished before the end of study leave so I thought - why not?

We went for six days and actually spent five of them just in Bruge there was that much to see! On the other we went to Ghent and Ypres.
It was actually really nice and relaxing being able to get up, wonder around the town, look in some shops, go home and do a bit more relaxing before heading out for dinner!

So here are some pictures from the trip!

DIY | Beautiful Bunting!

Wednesday 11 June 2014

Yay! All my exams are finished so no more revising!
And now I have a bit of spare time on my hands I thought I would get a little creative!

Here are my instructions on how to make some adorable bunting in 5 easy steps!


What You'll Need
Paper
Pencil
Ruler
Pins
Your chosen fabric(s)
Fabric scissors 
Thread
Sewing Machine
Iron
Ribbon or bias binding

    Step 1:
     First you will need to cut out a template using paper or card. For the ones I made I decided on 11cm.


    Step 2:
    Then fold your first piece of fabric in half so that you will have two triangles from each fabric.
    Have the right sides facing.

    It's a little hard to tell with this fabric but it is right sides facing!
    Pin the template to the open end and cut around it.


    Repeat for however many triangles you wish to make.


    Step 3:


    Next you will need to set up your sewing machine, I decided to just use white thread as it would fit with all my materials and would save me having to keep changing the thread!


    Use straight stitch to stitch around the edges of your triangles except the top


    At this point you can cut the excess point off of the triangle to save the bottom being a bit chunky like mine are.

    Step 4:
    Now turn the triangles the right way round.


    And iron them so that they stay all flat and pretty when you hang them up.


    Step 5:
    Okay, so now it's time to actually put the triangles onto the ribbon, thread or bias binding you are using.
    Measure how much you will need according on where you are wanting to hang it.
    Equally line out your triangles along the ribbon.


    Then fold it in half and pin it in place.


    You will then need to stitch this with your machine again to hold the triangles in place.

     And ta-dah! You have some beautiful bunting to brighten up your home!


    I hope this post is helpful to any DIYers!! and if any of you make your own bunting I would love to see it!

    - Amy Caitlin xo


    Get Your Very Own FREE Graze Box!

    Monday 2 June 2014

    Hi there!


    I got the opportunity to get my own FREE Graze box so I thought I would show you lovelies what I received.


    The different snacks!

    First are these Jaffa Cake Flapjacks which are hands down my favourite thing in this box! They are so delicious that I litterally made the 'mmm' sound as I bit into it!


    Verdict: Love!


    Then Basil and Garlic Olives.

    I love olives so I was quite keen to try these! They had an almost overpowering taste of basil but never the less they were still enjoyable!


    Verdict: Try


    Now, these may be called Boston Baguettes but they are really just like tomato-ey bread sticks!

    The gorgeous tomato taste goes really well with the tang of the BBQ relish.


    Verdict: Like!

    And lastly, Lightly Salted Pistachios. Now, I'm not really a nut person normally except for the hazelnut which is in the purple Quality Street so I thought I'd give it a go...and I have to say I didn't like them. They were quite salty and had a little bit of a weird after taste.                                                                
    Verdict: Bin


    So what can you take away from this post?
    You too can get your first, fifth and tenth box free with my personal friend code!
    AMYL3M2WB


     I would just like to thank Graze for how personalised my box felt as I had gone online and picked what I would like to try before hand and there were no nasty surprises!

    Happy Snacking!

    - Amy Caitlin xo